This is the first in the tutorial series on how to use the Google VR SDK to distribute your VR content in an Android app by embedding the VR View. VR view allows you to embed 360° VR media into websites on desktop and mobile, and native apps on Android and iOS. This technology is designed to enable developers of traditional apps to enhance the apps with immersive content. For example, VR view makes it easy for a travel app to provide viewers with an underwater scuba diving tour as they plan a vacation or for a home builder to take prospective buyers on a virtual walkthrough before the home is built.
Try to click and drag in the image above, it's a VR view!
VR view also addresses a common developer concern: the limited availability of VR hardware among the general public. Although VR view supports true stereoscopic VR playback through compatibility with Google Cardboard, it defaults to a simple “magic window” mode that works on everything from desktop browsers to mobile apps without any special hardware.
Google VR SDK for Android
The Google VR SDK for Android supports both Daydream and Cardboard, including a simple API used for creating apps inserted into Cardboard viewers, and the more complex API for supporting Daydream-ready phones and the Daydream controller.
The Google VR NDK for Android provides a C/C++ API for developers writing native code.
Developers familiar with OpenGL can quickly start creating VR applications using the Google VR SDK, simplifying common VR development tasks such as:
- Lens distortion correction.
- Spatial audio.
- Head tracking.
- 3D calibration.
- Side-by-side rendering.
- Stereo geometry configuration.
- User input event handling.
We're keeping the hardware and software open to encourage community participation and compatibility with VR content available elsewhere.
To learn more:
- Use Google's Get Started guide for the Android SDK and NDK.
- Download the Google VR SDK for Android.
- To explore the Google VR API, see the Android API Reference.
Download the Google VR SDK for Android to build a VR 360° video player to Continue with this tutorial.
Prerequisites
Building the sample app requires:
- Android Studio, 1.0 or higher.
- Version 23 of the Android SDK.
- Gradle 23.0.1 or higher. Android Studio will allow you to upgrade if your installed version is too low.
- A physical Android device running Android 4.4 (KitKat) or higher.
Project Setup
1. Open Android Studio.
2. Create new Android App File > New > New Project…
3. Provide the Application Name, Company Domain and Provide Project Location. Click Next.
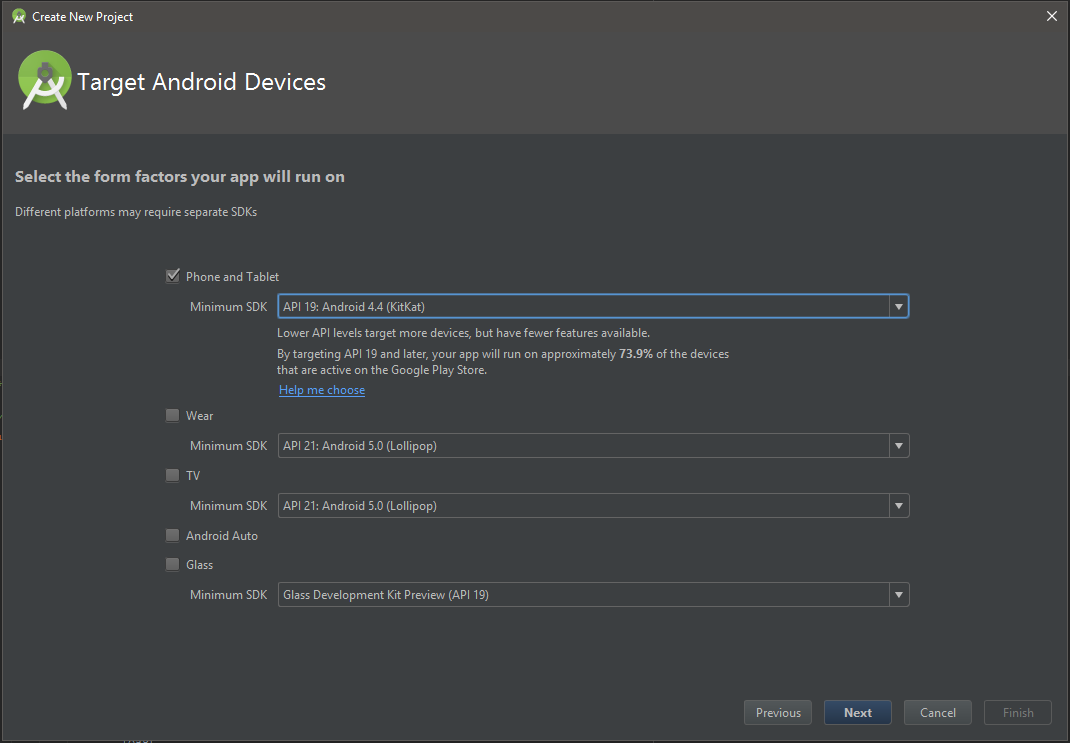
4. Select Phone and Tablet. Select the Minimum SDK “API19:Android 4.4 (KitKat)”. Click Next.
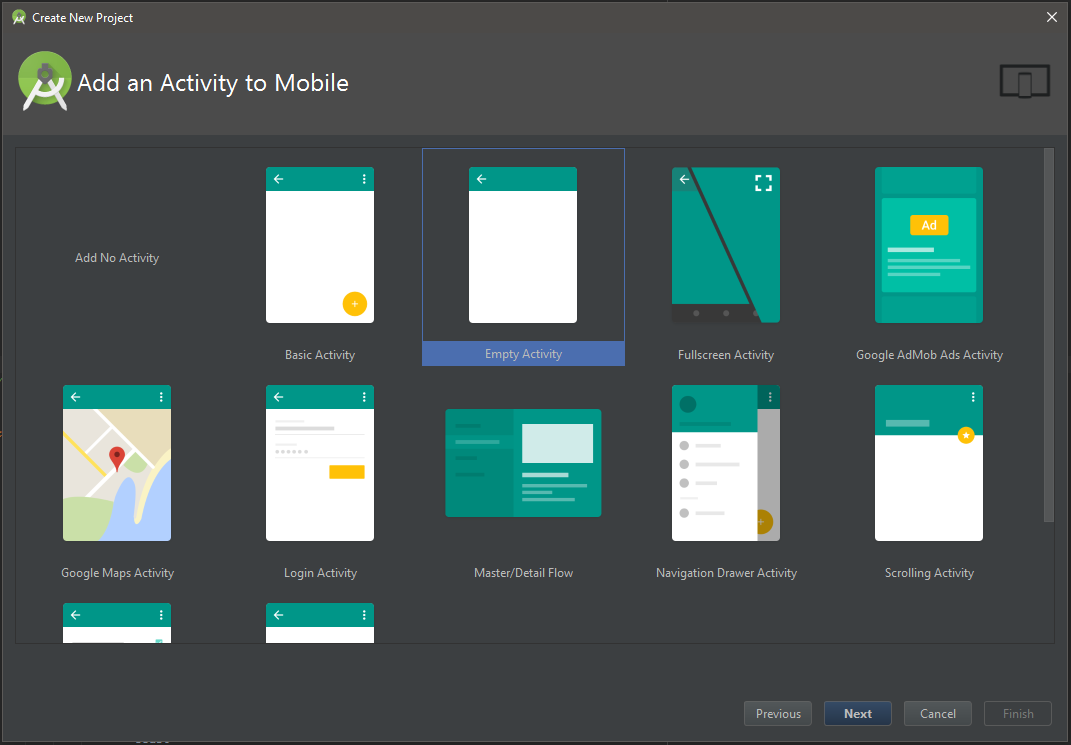
5. Select Empty Activity. Click Next.
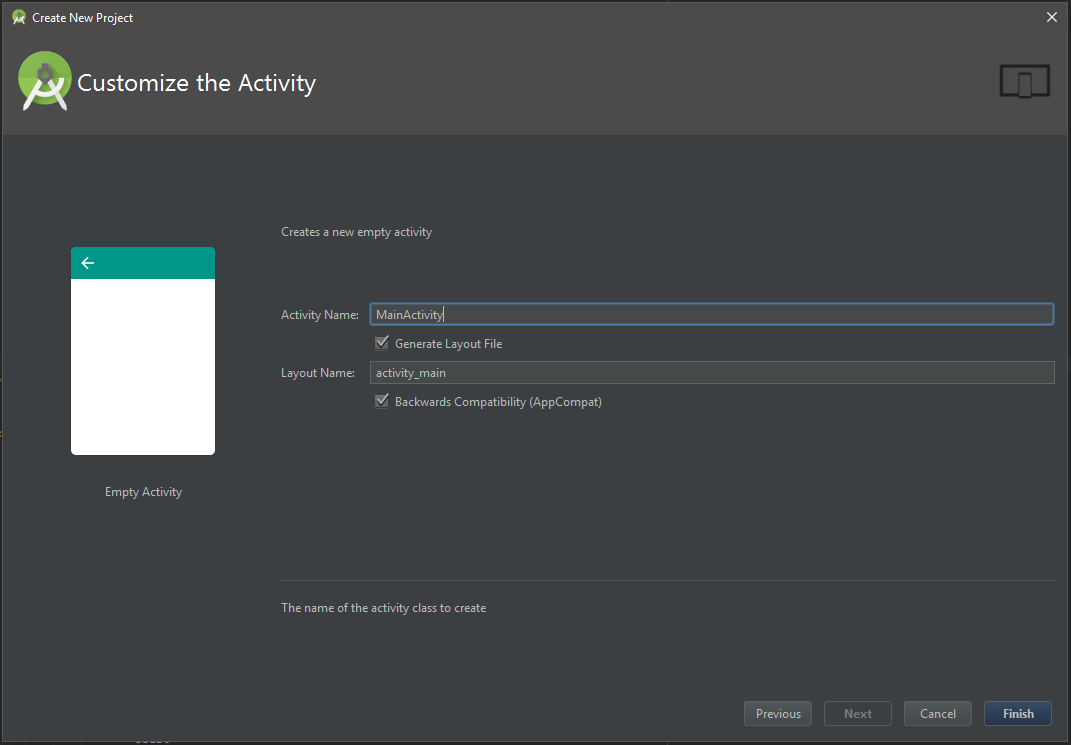
6. Enter Activity Name and Layout Name. Click Finish.
Your project is now setup to use the Google VR SDK.
Import Libraries from Google VR SDK
To build this tutorial, you will need the need to grab the following .AAR files from the libraries folder of the SDK:
- common.aar
- commonwidget.aar
- videowidget.aar
Here is how.
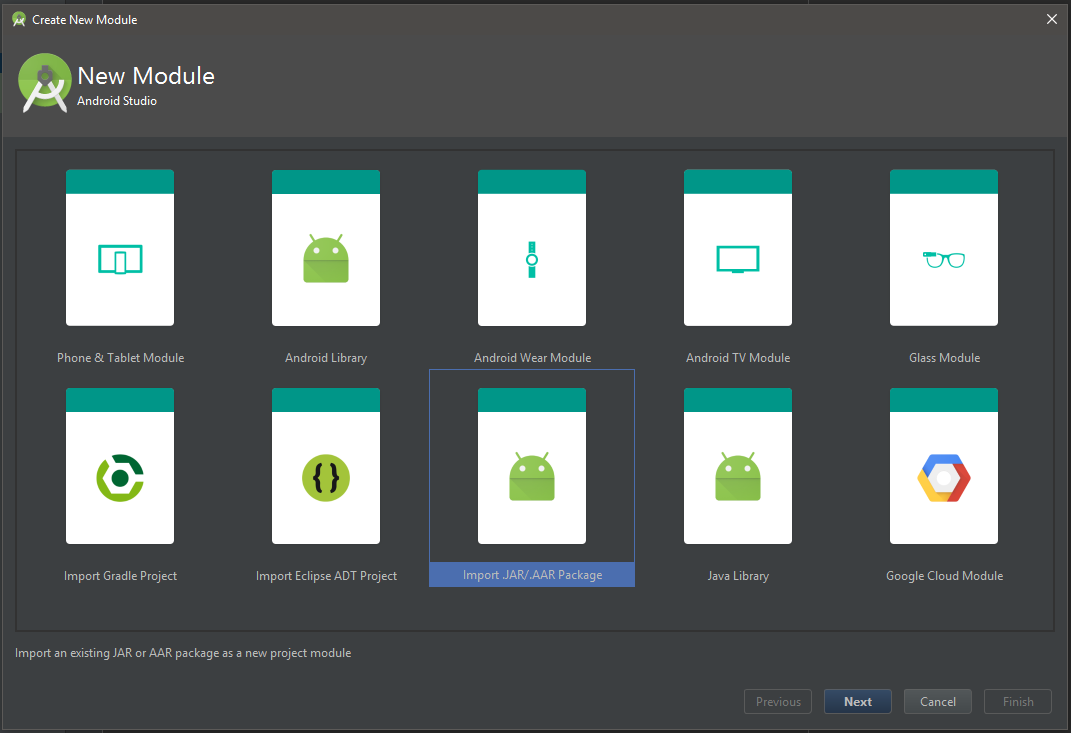
1. Create new modules for each of these libraries. Using the Android Studio’s GUI, this can be done via File > New > New Module…
2. Select Import .JAR/.AAR Package.
3. Click on the … icon to the right of the File Name Field. Locate one of the .AARs and click OK.
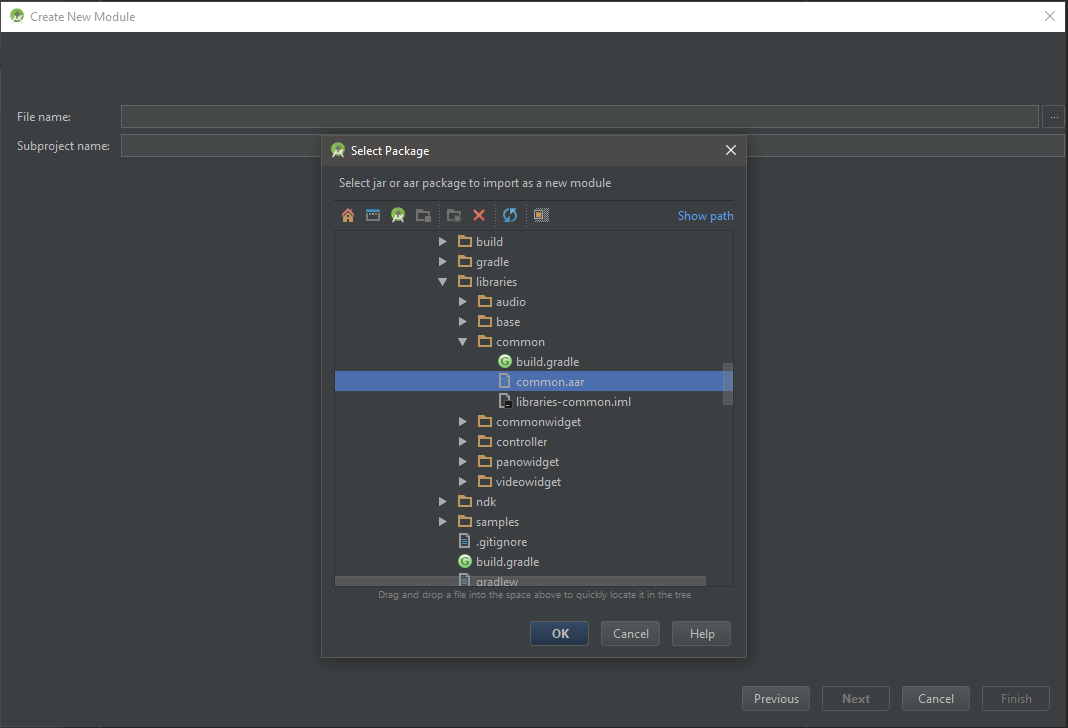
4. Click Finish.
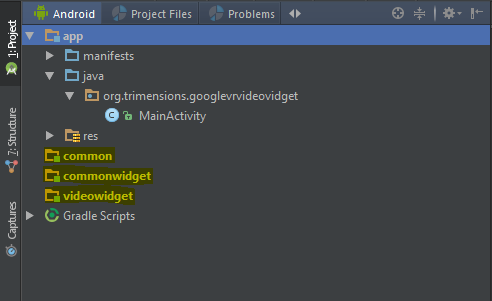
5. The newly imported module will be added to the Android Project view of Android Studio.
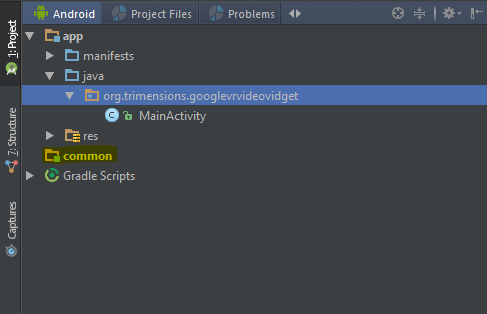
6. Repeat the above steps and import the other .AARs.
7. Press F4 or right click on the App folder in the Android Project space and select Open Module Settings.
8. Select the Dependencies tab.
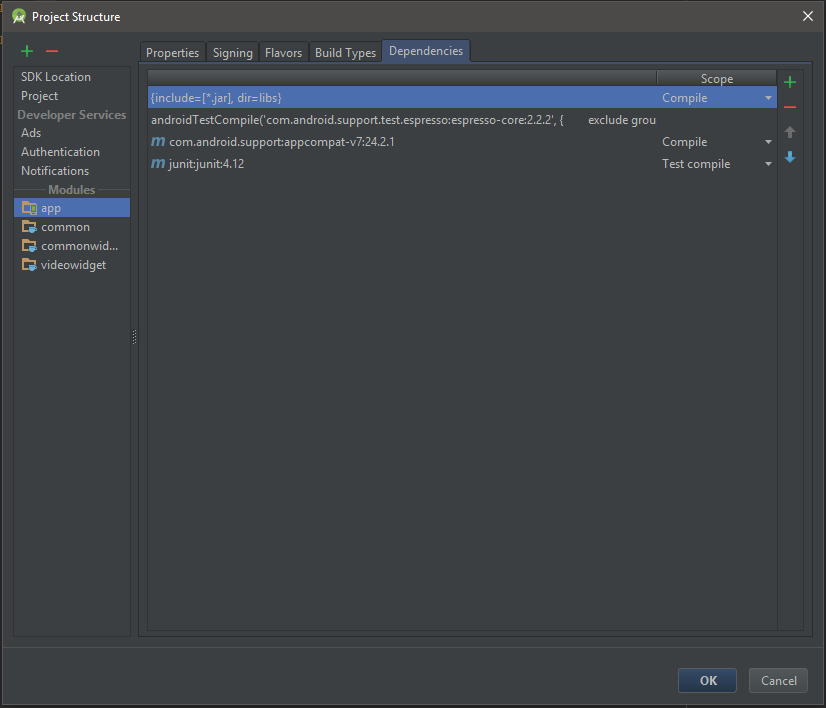
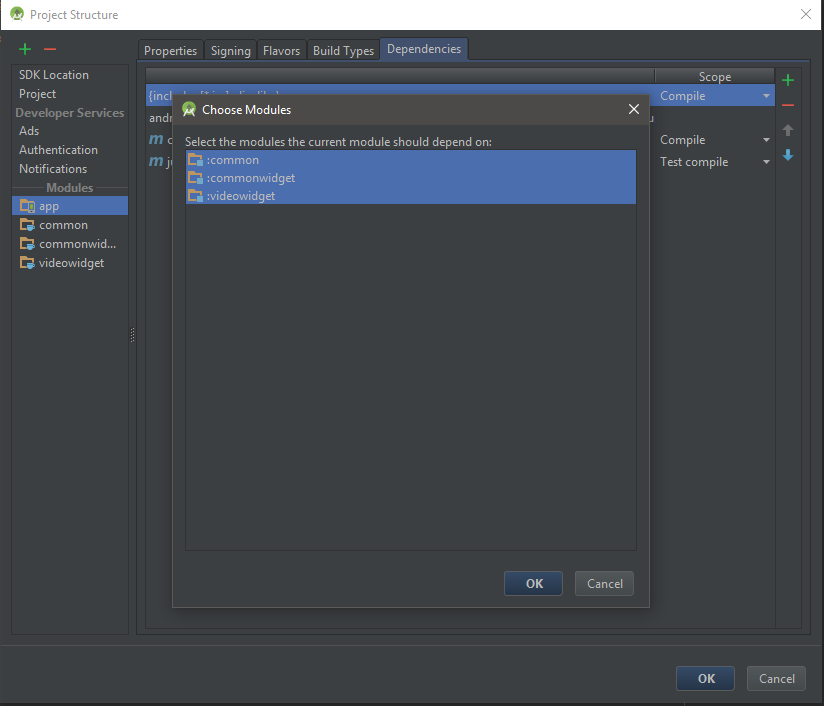
9. Click the + button on the right. Select 3. Module dependency.
10. Choose all the newly imported modules – common, commonwidget and videowidget. Click OK.
11. Open build.gradle (Module: app) [ alternatively, build.gradle(Module: _your_app_name_)].
12.Insert the following into your gradle file:
Your build.gradle should look similar to:
Once this is done for all of the required libraries, you will be able to reference code in the Google VR SDK in your app.
Create the app
1. Open the layout file from. Navigate to _your_app_name/res/layout/_your_layoutfile_name_.xml from the Android Studio Project space.
2. Replace with the following code
3. Navigate to the Activity class associated with the layout file _your_app_name_/java/_your_package_ name_/_your_activity_class_.java from the Android Studio Project space.
4. Retain the opening line of the java file, pakage _you_package_name_;
5. Replace the rest of the code with the following code
The app can now be deployed to any phone with Android 4.4(KitKat) and above.
Note: The 360 video will play on a physical device and not the Emulator.
The VrVideoView is used to render the 360 video and is loded via the loadVideo api call.
Project related files.